


How to use
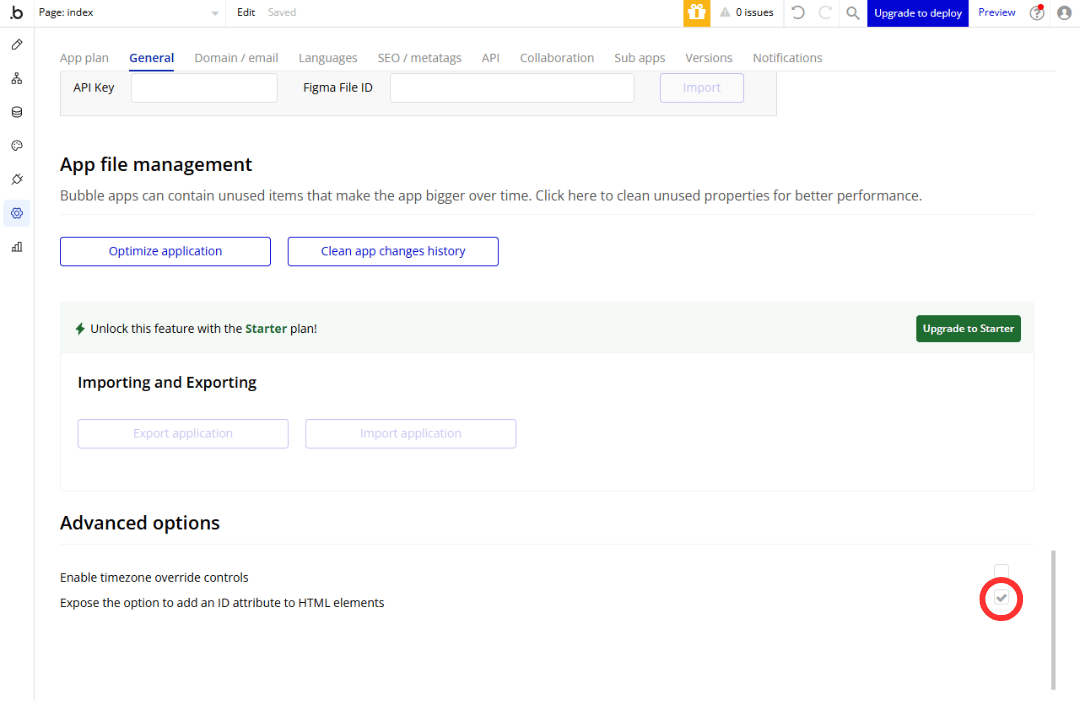
Preparation: Enable ID Attributes
Before you begin, make sure that the option to input ID attributes is enabled.
- Open the Settings panel by clicking the gear icon in the left sidebar.
- Navigate to the General tab.
- Scroll to the bottom and check the box for Expose the option to add an ID attribute to HTML elements.
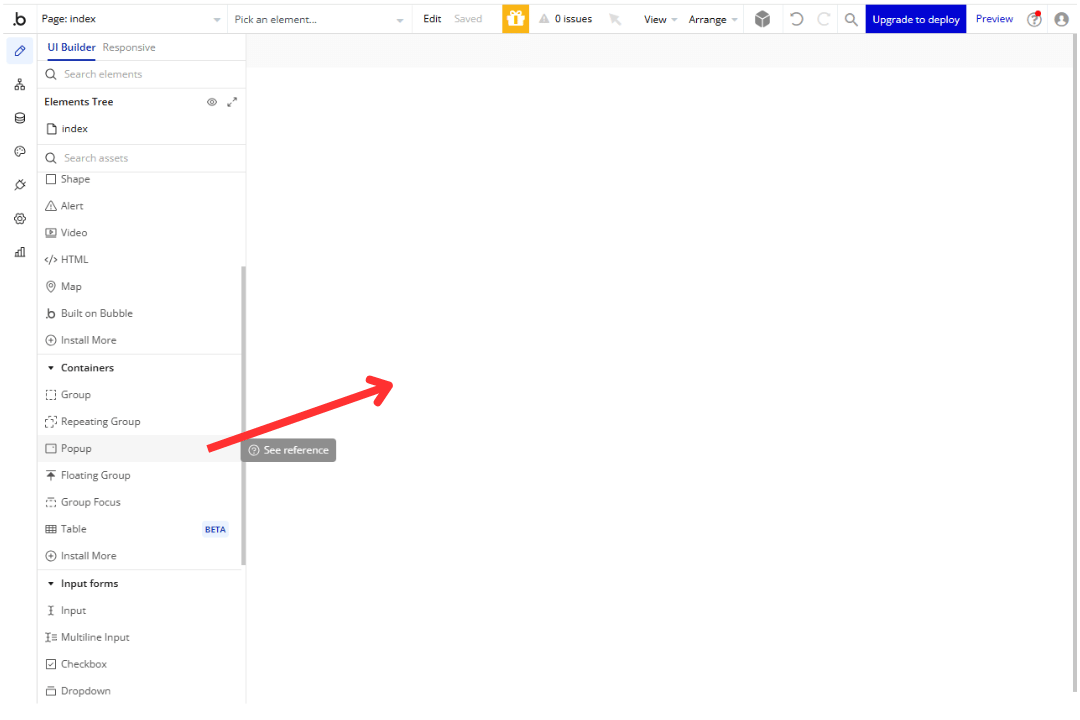
Setting Up the Popup and Assigning an ID
Go to the Design tab and place a popup element on your page.
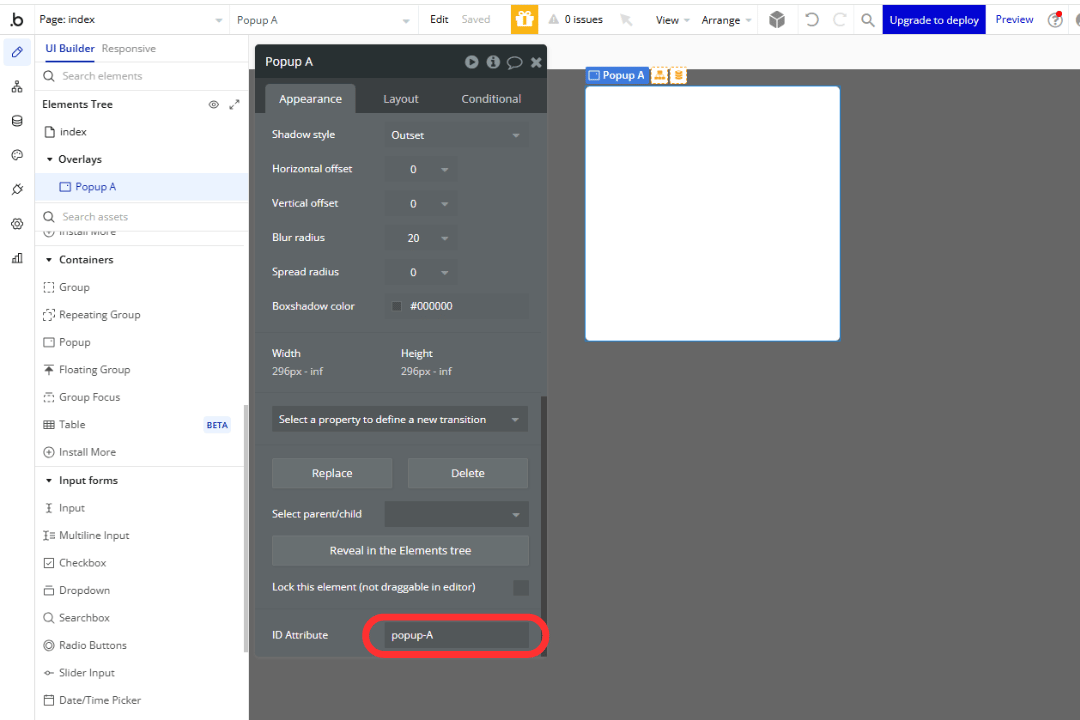
In the popup’s Appearance tab, scroll down to find the ID Attribute field.
Enter a unique ID for the popup (make sure it doesn’t conflict with other element IDs). For this example, we’ll use popup-A.
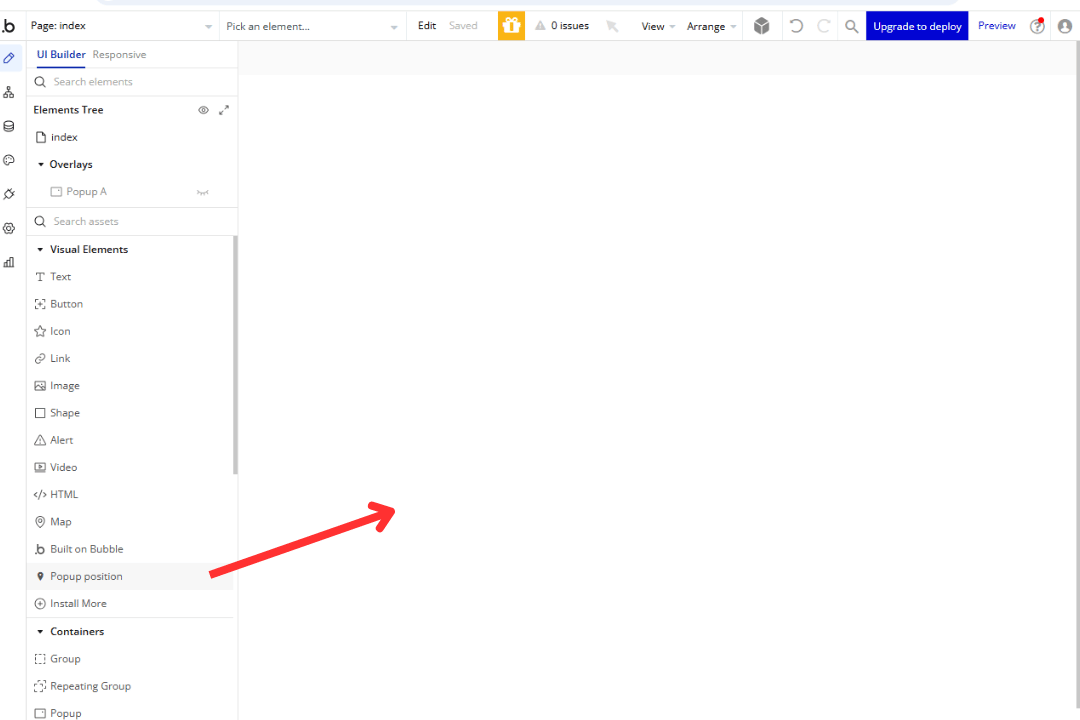
Adding the Plugin Element
Place the Popup Position element on your page.
Adjusting the Popup Position
After adding the plugin element, configure the popup’s position settings as follows:
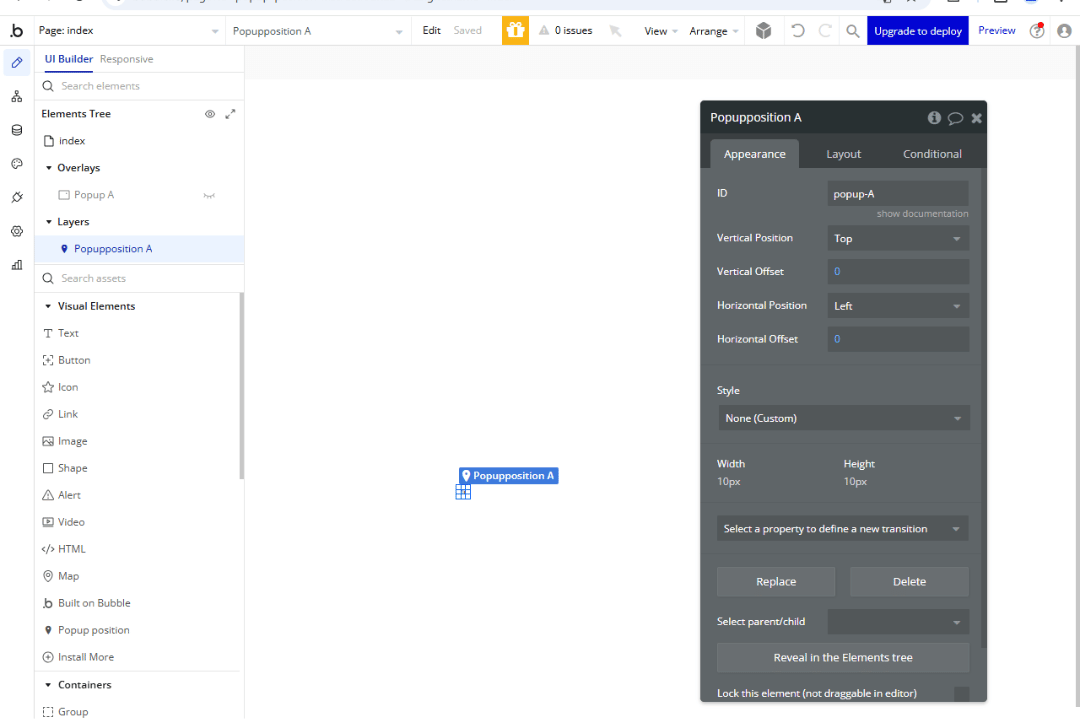
-
ID
Enter the ID you assigned to the popup (e.g., popup-A). -
Vertical Position
Choose the vertical alignment of the popup: Top, Center, or Bottom. -
Vertical Offset
Adjust the vertical position by entering a value in pixels (px).- Positive values move the popup down.
- Negative values move the popup up.
-
Horizontal Position
Choose the horizontal alignment of the popup: Left, Center, or Right. -
Horizontal Offset
Adjust the horizontal position by entering a value in pixels (px).- Positive values move the popup to the right.
- Negative values move the popup to the left.
Final Steps
That’s it! You’ve completed the setup. Now test your popup to ensure it appears in the desired position.